Simple Delights

Saturday 22 December 2012

Orange Chocolate Cake


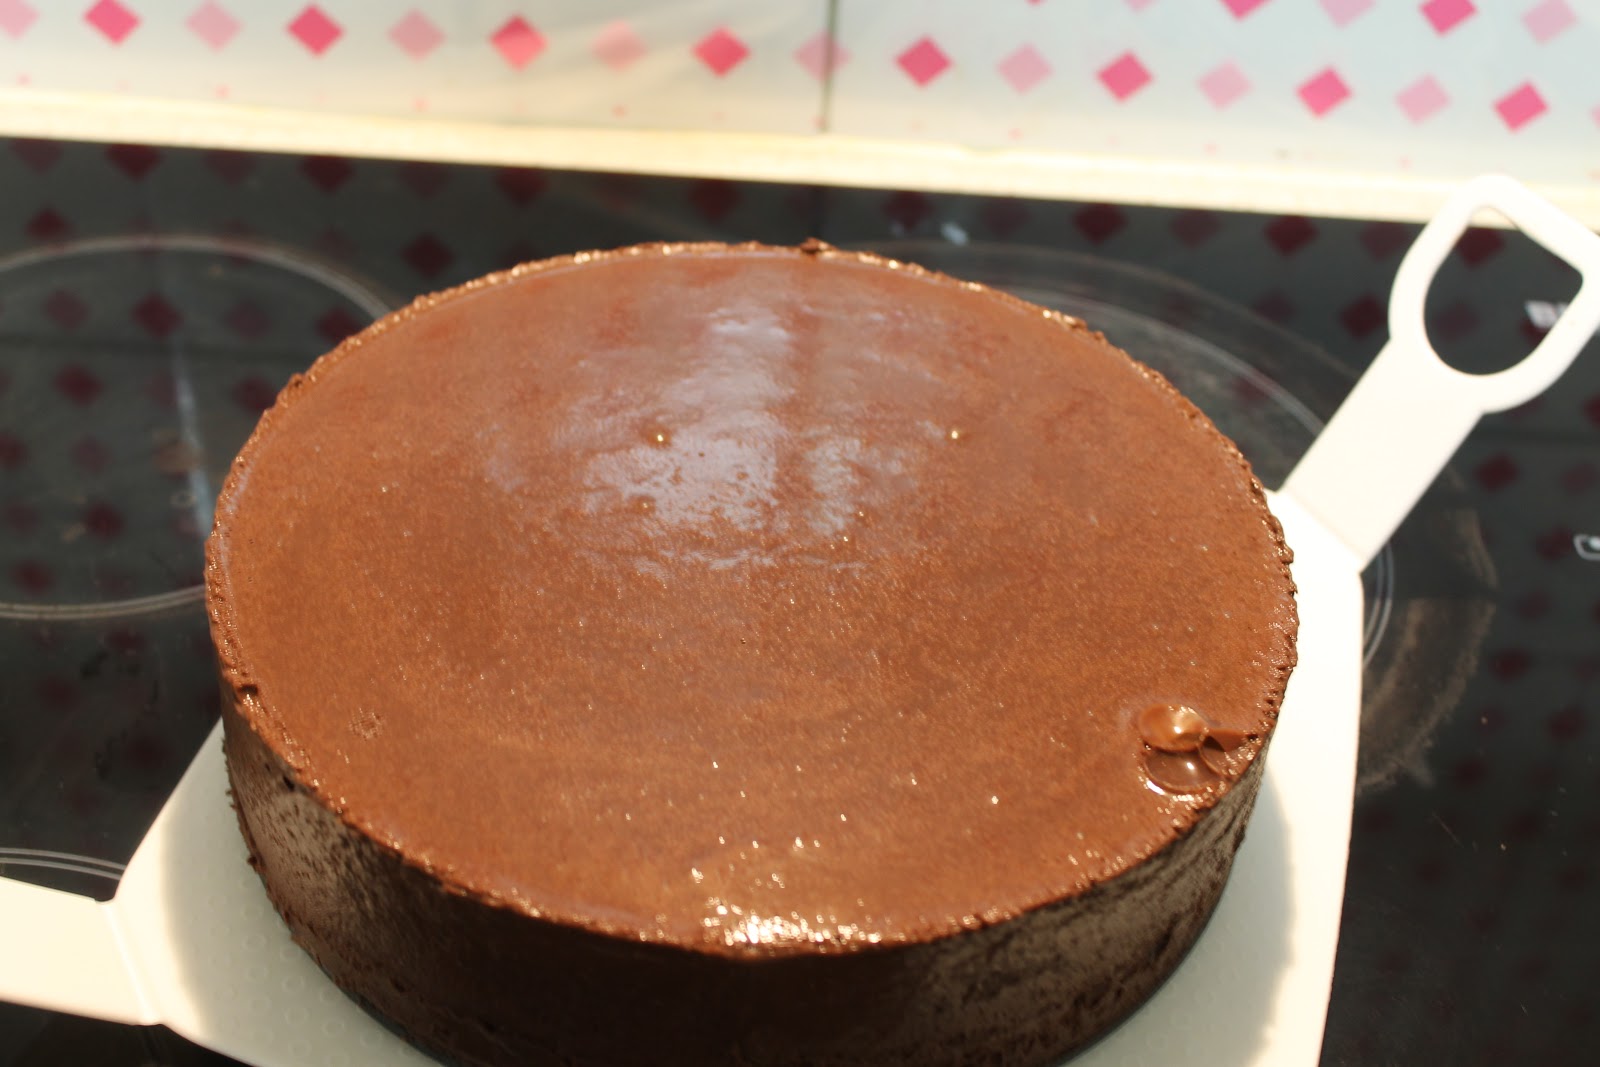
My best chocolate cake by far.

If you know me for awhile ( which can be quite a long while) , I am not a chocolate fan at all. How can a lady does not like chocolate at all. I do like chocolate but not a fan. Even if I got myself some chocolate it always be those "rare" type - dark chocolate or the Japan Brand ( my most favourite) Royce. Is always more cocoa than sweet. I remember whenever I was given chocolate , it was quite hard to tell the person thanks but err. Well I just take it and share it with others.

So to decide to bake a chocolate cake is totally out of the blue. This is not the chocolate cake I have make the first . I have tried out the Recipe by chance when I have extra buttermilk in the fridge, just do not want to waste it so I decided to use it for good . I have some organic dark chocolate , why not just give myself a chocolate treat. There will be some day you really need some good dark chocolate to boost your happiness.

After the few attempt I really love the taste of this cake. So I modify and make some chocolate ganache and bring this yum cake to my office Christmas Party. It always great to have chocolate cake in festive season , what more is for Christmas.

The modify recipe is as below :

Ingredient :
114g cake flour (plain flour is fine too)
46g of cocoa powder
1 tsp baking powder
1/4 tsp salt
170g unsalted butter, softened

180g granulated sugar
2 large eggs ( I used 3 eggs, the egg I bought was pathetiquely small)
90ml Milk + 90ml fresh orange juice.( Original recipe is 180ml buttermilk )

2 tbsp Bailey (optional)
1 tsp vanilla extract
113g finely chopped bittersweet chocolate ( I used organic dark chocolate it taste creamy)

1tbsp of Orange Zest

Method :
1. Preheat oven to 170 degree.Grease a 8" round pan and dust with flour .
2. In a medium bowl, sift together the flour, cocoa powder, baking powder, and salt. Mix to combine and set aside.
3. Beat the butter with an electric mixer, with medium speed for 2 minutes, until very creamy. Gradually beat in the sugar. Increase the speed to medium-high and beat for 3 min, until the mixture is well blended and light. At medium speed, beat in the eggs one at a time, mixing well after each addition and scraping down the sides of the bowl as necessary.
4. In a small bowl, stir together the orange milk , Bailey ,orange zest and vanilla extract. 

5. At low speed, add the dry ingredients to the butter mixture in three additions, alternating it with the milk cream mixture in two additions, and mixing just until blended. Remove the bowl from the mixer stand and stir in the finely chopped chocolate.  Scraped the batter into the prepared cake moulds and smooth the tops.
6. Bake the cakes for 40 to 45 minutes, until a cake tester inserted into the center of a cake comes out clean. Cool the cakes in the pan set on a wire rack for 10 minutes. 

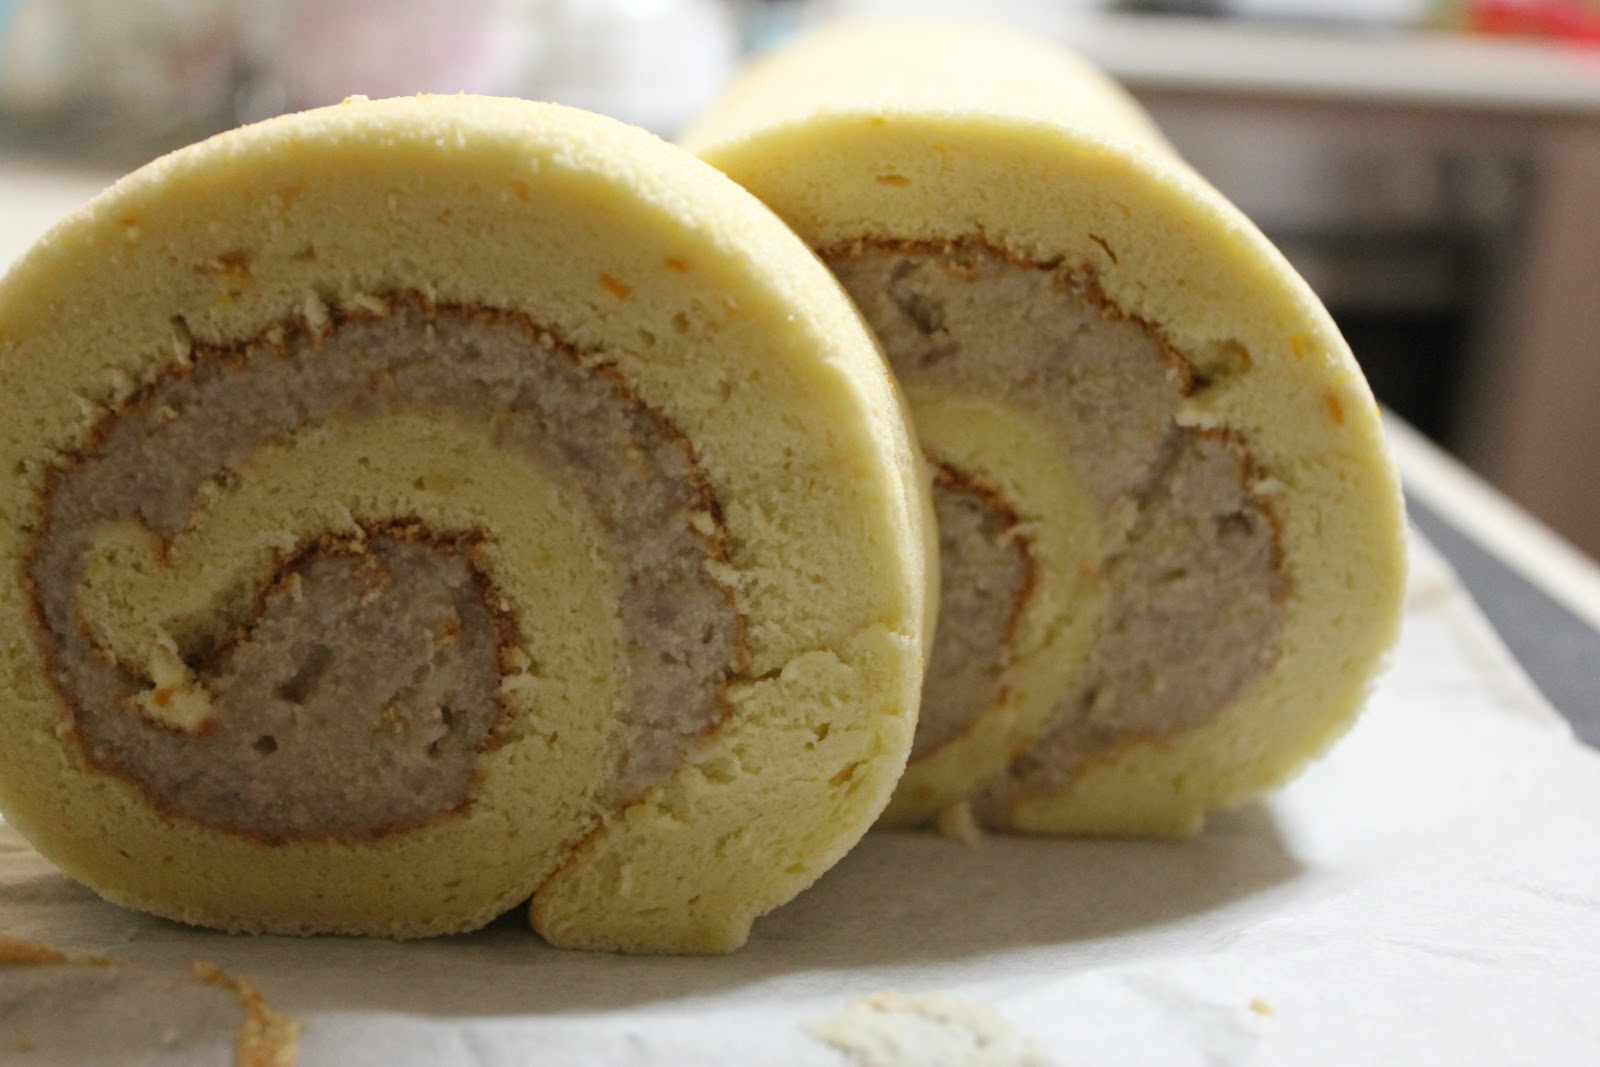
7. When the cake has cool down cut it into 2 slices.


Chocolate Ganache Filling  (Adapt from Donna Hay )
I have it modify to suit the texture I want it


Ingredients:

225g Dark Chocolate
1 cup of pouring cream
3 egg yolks
1/3 cup caster sugar
1 tbsp of Gelatin
3 tbsp of Water 

Method : 

1. Pour water into a bowl and sprinkle gelatin on it and let it bloom. Put the gelatin bowl on a bowl of hot water to have it melt .
2. Place the chocolate and cream in a saucepan over low heat and stir until melted and smooth.
3. Place the egg yolks and sugar in a heatproof bowl over a saucepan of simmering water and beat until thick and creamy.
4. Fold the chocolate mixture through the egg mixture beat for a minute and add in gelatin. Beat until well combine ( about another min) . Let the mixture cold down to room temperature.

Assemble :

1. Put one slice of the chocolate cake at the bottom of ring mould.
2. Pour in half the chocolate ganache .
3. Place another slice of the chocolate cake on top of the chocolate ganache.
4. Pour in the reminding chocolate ganache. Smooth the top make sure the side of the cake is well coated. 
5. Refridgerate the cake over night and serve while is chill. 


The cake was soft and moist , it was simply delicious.My boss love it and my colleagues enjoy it. 

I change my own thought of a chocolate cake. I will of course bake this again . In fact the 1st time when I bake this was without the chocolate ganache, it was so nice with a cuppa .


I manage to keep some for my love and we have a lovely sharing on a Saturday morning. Is such a bliss. He said this is the best chocolate cake he ever has. With a hint of orange taste in the cake it just bring a citrus taste to this moist chocolate cake. Give it a try on this festive season .

Blessed Christmas and new year :))
   

Sunday 2 December 2012

Purple Sweet Potatoes Chiffon Cake


I love potatoes. Never know that I can combine the potatoes in chiffon cake.

Is not easy to find purple sweet potatoes back home.Surprisingly is quite easy to get purple sweet potatoes in Australia. The purple sweet potatoes always is cook as a dessert in soup for Asia family, we will boil it in syrup water with some ginger it. It is good during cold night and is good for digestion as well.

Looking through some of the purple sweet potatoes chiffon cake , I find this appealing and would like to give it a try ->Evan's Kitchen. So here is the recipes I used for this cake:

Ingredients (used 22 cm cake  mould) :

130g purple sweet potato
4 tbsps milk
4 egg yolks
25g brown sugar ( I used caster sugar 40g)
65ml canola oil
4 tbsps water ( I used milk )
110g cake flour, sifted
5 cold egg whites
65g caster sugar
80-100g raw purple sweet potato cubes, lightly coated with cake flour to prevent from sinking to the bottom of the cake


Method :
1. Peel and chop purple sweet potatoes, then steam until cooked. lightly mash with fork, add milk and puree with hand blender until emulsified.
2.Put egg yolks, brown sugar, oil & water in a metal bowl whisk until well blended. add in sweet potato puree and mix well. fold in flour until well combined.
3. Pour egg whites and caster sugar in a bowl beat with hand mixer until stiff peaks, then fold the whites into the yolk mixture in 3 additions. fold in the purple sweet potato cubes.
4. Pour mixture into ungreased chiffon/angel cake tube pan and knock the pan against the counter top to remove some air bubbles.
5. Bake in a preheated oven of 180C for 40 mins or until a wooden skewer inserted into the cake comes out clean. remove tin from oven and immediately invert it until the cake has cooled completely.


Again I love the light texture of this cake. I suppose I knock the pan against the counter top too hard the sweet potatoes seem to be quite at the bottom of my cake. I share some with my gal friends. They love it , they are quite surprise - Oh Purple Sweet Potatoes Chiffon Cake? Well if the taste is yum I guess nobody mind a little bit of surprise .


Wednesday 28 November 2012

Avocado Chocolate Cream Cheese Cake


October was an extremely busy month for me. It just happen some of my great girl friends were born in this month.So is a month to celebrate , to laugh, to eat and to share our life in different phrase.

This precious friend of mine love avocado. I want to make a cake with avocado and is a birthday cake not the chiffon cake (Avocado Chiffon Cake) . Looking through some recipe, and  I do not have lot of time to prepare a cake we need on the next day. I thought of modify one of the recipe that pretty close to what I can do :)

As I remember there was this creamy avocado chocolate shake I had with a friend in one of the Indonesia restaurant. Apparently chocolate goes well with avocado , so why not do a layer cake with this idea. So here is where this Avocado Chocolate Creamcheese Cake come by .

Ingredients :

Base :
100g Digestive biscuit
70g melted butter

Chocolate Cream layer :
100g Dark Chocolate
50g Pouring Cream
20g Caster Sugar
1Tbsp of gelatin
3 Tbsp of water

Avocado CreamCheese ( Adapt from -> Avocado Chilled Creamcheese Cake)
250gm cream cheese
60gm sugar
200gm avocado flesh ( sift it so it will be smooth and easy to combine)
1 Tbsp lemon juice
11/2 Tbsp gelatin
50ml Water
200gm whipping cream

Method :

1. Break the digestive biscuit into small crumbs and mixed with melted butter and press into a 8' round loose base cake tin. Chill in the fridge until firm.
2.For chocolate cream layer - Sprinkle the gelatin onto the 3 Tbsp of water. Let it bloom. Once it bloom put the bowl into a hot water and let the gelatin dissolve. Leave to cool to room temperature
3.Put chocolate and cream in a mixing bowl on a pot of simmer water, melt the chocolate and combine with the cream ..
4.Take the mixing bowl out from the simmer water , pour in the gelatin and mixed well.
5. Pour the chocolate cream layer into the biscuit base and put in the fridge till it set and chilled well . At least 2hours
6. For avocado cream cheese -Sprinke gelatin onto water let it bloom. Once it bloom put the bowl into a hot water and let the gelatin dissolve. Leave to cool to room temperature.
7. Cream cream cheese and sugar until smooth.
8. Combine lemon juice with avocado flesh and stir until smooth. Put this into (7)and mix until well combined.
9. Add gelatin into avocado cream cheese mixture till well combined.
10.Whip whipping cream until soft peaks and fold it into (9) until well combined.
11. Pour cheese filling onto chocolate cream layer and level the surface. Refrigerate for 4 hours or until set.


The cake is yum and the chocolate did goes well with avocado cream. What happen was I forget to fold in the whipping cream but the cake is still creamy enough. I guess if I have the cream fold in, my cake will be taller and more creamery?  Not too sure might try to make this non bake cream cheese cake again when next avocado season come by .


Wednesday 7 November 2012

Orange Chocolate CheckerBoard Cake


It was a busy month started from September. We are busying celebrate birthday and more so busy welcoming spring. However spring does not seem to be stable. It was wet and cold. At time night temperature drop quite dramatically.

Well is always good to make it a point to celebrate one birth. I have been wanting to do this Checkerboard cake when I spotted the recipe ->Table for 2 or more

I did not follow the recipe exactly , as I am not a coffee person, more so this cake is for a mom to be. I guess coffee is not good for baby, hence I change the coffee layer to orange layer which is the orange sponge  I used in my Blueberry creamcheese orange sponge cake .


My checkerboard is not pretty as Table for 2 or more. When we unmould the cake , is a bit too thin and is not easy to cut into the shape we prefer. I used whip cream instead of buttercream for the outer layer of the cake. I did use buttercream in the layer of the checkerboard. Am not sure how the buttercream should taste like. Am not really a butter fan so it seem a bit too strong for me the taste.

I hope the cake has bring a good memory to my friend. I might redo this again. Overall is a good experience to know how to make the checkerboard effect in a cake.

Sunday 28 October 2012

Coconut Panna Cotta Mango & Orange Egg


I have come across this dessert for awhile. Panna Cotta is something I learn when I move to Australia. It was a "jelly" kind of dessert but mostly is in creamy taste. As in the basic is bring the cream to boil and add in gelatin to let it set into soft creamy "jelly" type dessert. The creaminess of the dessert often bring a dinner meal come to an end with a satisfaction feeling yet not over full.

I have take this opportunity to make this dessert to enter the -> Aspiring Bakers #24 (October 2012) : Jellies & Puddings hosted by Charmaine of MiMi Bakery House 
  
m still a very amateur in food blogging world but is excited to be able to share recipe with those who love to bake, cook and share. 

In my early year of learning to cook and bake , I come to know a lot of great food bloggers from the same country as me and reside in other foreign land. The love of my own home country food has always follow me wherever I goes. From not knowing what to do and learning from people through their food sharing, is such a wonderful experience for me.I hope I be able to share my little part and encourage other to want to bake , cook and share as well.


For this recipe I follow the actual link from this wonderful food blogger -
>Seasaltwithfood


I did not do as the recipe as I do not have so many egg shells. As a result my recipe is half the original recipe .
10 empty eggs shell. 

Process of cleaning and sterilized egg shell.

Carefully ,crack the top part of the egg, remove the top part of the egg shell carefully and do not break the eggs shell. Pour the egg out ( I used it to make some cake) , using warm water to clean the eggs shell properly.Dry the surface of the egg shell and gentle place onto the cooling rack and place them into the preheated oven for 15min.
Let the sterilized egg shells cool completely before you fill them with the coconut panacotta mixture.

Recipe as show :

Coconut Panna Cotta
250 ml Coconut Milk
50 ml  Whipping Cream
60 g White Chocolate
1.5 Tbsp Gelatin
4 Tbsp of  Water

Method

1) Pour 4Tbsp of water in a bowl, sprinkle 1.5 Tbsp gelatin on top of it and let it bloom.
2) In a saucepan, combine the coconut milk and cream. Bring it to a boil and simmer for one minute.

3) Remove the pan from the heat and add the white chocolate and gelatin.
4) Stir the chocolate and gelatin until completely dissolved.
5) Strain the mixture through a fine sieve and pour it into the prepared egg shells. 
6) Once the coconut panna cotta has set, use a small spoon to scoop out a small bit from the center to make a small indent.This is for the mango and orange fruit jelly later which resembles egg yolk.

Mango And Orange Fruit Jelly
100g Mango Chunks ( I used fresh fruit)

100 ml Orange Juice ( I used fresh squeeze orange juice)
2 Tbsp Sugar or to taste
2 Tsp of Gelatin
1 Tbsp of Water

Method

1) Prepare the mango and fruit jelly when the coconut panna cotta is completely set and when we have scooped out the holes in the center of the panna cotta

2) Pour 1 Tbsp of water in a small bowl and sprinkle the gelatin on the water and let it bloom
3) Puree the mango, orange juice and sugar in a blender, add more sugar if necessary
4) Pour the mango and orange puree into a saucepan, heat over low heat until it starts to bubble.
5) Remove the pan from the heat and mix in the gelatin. Stir until the gelatin has completely dissolved.
6) Sieve the mango and orange puree through a fine sieve and leave it to cool completely but not set. I put in the fridge for about 5min. Is not for setting but must be pourable as we want to form a yolk look in the coconut panna cotta.
7) Slowly spoon the mango and orange jelly into the center of  the coconut panna cotta.
8) Return to the fridge until the jelly is set. And enjoy it !


I simply love the look of this dessert especially when serve in the egg shells. It look just like half boil egg yet it is a sweet and with my favourite ingredient Coconut cream :)

Hope you enjoy this and I am sure if you bring this dessert to a party it sure will challenge the mind of the one who eat it. Is it an egg or is it a sweet? =)


Wednesday 24 October 2012

PassionFruit Chiffon Cake


I should be more diligent in updating my blog, so I wont miss out any of my favourite recipe and will have another chance to bake it again !!

There are so many cakes to bake , so little time to do it. I really salute those blogger who have to work , take care of the kids and continually baking , cooking, writting ! I always think when GOD created woman we are the upgrade version of HIS 1st mankind creation ( Man) , hence we are super duper multitask , higher endurance, better persistance, great in organising , energetic , able to react faster and yak dak lak dak more and more.. Nope not saying man are not good, every creation from GOD has HIS great purposes, being a woman I am just proud of who I am and great to see so many great woman around me showing me great example I can follow.

I do not have children yet so I really salute those working mom , able to handle so many things at a time. I am still learning to balance my life between work, family and church. The commitment I have in the church took out most of my pastime. Thank GOD those who been given more will be empower more as we do HIS work.

Ok back to my night of being cozy yet wanted something different, chiffon is always my BEST choice. I happen to have few small passionfruit from my mom in law. I often would love to enjoy fruit fresh as it  is  full of Vic C and great to consume. However am thinking is it any recipe I can used for passionfruit beside a cheesecake( which I did and will share recipe later).

So here is my love -Passion Fruit Chiffon Cake . The fragrant in passionfruit is simply delightful and while baking it just make one anticipate and hope to have it once it out from the oven. The sweetness of the fruit is so tempting.

Here is the recipe I follow/adpat ->Sugar and Everything Nice
I used a 20cm chiffon tube pan


Ingredients:

4 yolks
40g sugar
45g canola oil
65g passion fruit pulp (including the seeds - about 2 to 3 fruits)
20g Milk

100g cake flour
1/2 tsp baking powder

4 whites
40g sugar
1/8 tsp cream of tartar

Method:

1) In a bowl, sift together the flour and baking powder.
2) Whisk together egg yolks and 50g sugar until pale in colour.
3) Gradually add in oil, passion fruit pulp,and milk whisking them all until combined.
4) Add all the sifted flour and baking powder. Whisk until the mixture becomes a thick and consistant batter.
5) Place the egg whites into a clean metal bow. Using a mixer, beat the whites until frothy. Add in the cream of tartar until whisk for a minute before gradually adding in the 40g of sugar. Continue to beat until stiff peaks are formed.
6) Gently fold in egg white mixture into egg yolk batter in 3 seperate additions until well combined.
7) Pour batter into a 20cm chiffon tube pan. Bake in preheated oven at 175C for 40-45mins.
8) Invert pan immediately to cool completely before unmold.


I love this cake the fragrance of Passionfruit is strong , the cake is soft and has some sourish taste . Overall is a very refreshing cake with a cuppa on hand , it just so relax to enjoy this in a lazy weekend afternoon.

 
If you have some passionfruit on hand why not give this a try :)

Sunday 7 October 2012

Yam (TARO) paste SwissRoll


One the night that I just want some simple and fast cake SwissRoll has been my choice of cake now :) Simply love the easy way of preparing the cake and it can be enjoyed after 1 hour of baking that just suit into the night I want a light cake but do not want to hassle too much on baking.

Beside Pandan, Palm Sugar,Coconut Cream , my another love ingredient is Yam or Taro. Some relate it as purple sweet potato (I do not quite agree with this as that is a sweet potato that is purple ). My choice of SwissRoll in a bakery shop is always Pandan SwissRoll or Yam SwissRoll. Well I can not get this 2 flavours of SwissRoll here. The only solution is to make for myself . Here is my attempt and I would say the recipe is easy to follow for the cake as for the yam paste I adapt from another recipe and change it to my liking and simply like the fragrance of the yam and creaminess that I input in it.

Orange Chiffon Cake :
(adapt from ->Baking Library)

Ingredients :
80g egg yolks, room temperature ( about 4 eggs)
25g castor sugar
2tbs + 1 tsp corn oil
2tbs + 1 tsp  milk
75g cake flour
160g egg whites
60g castor sugar
35g Orange Zest


Method :
1. Preheat Oven to 180 C and line tin with baking paper.
2. In a mixing bowl ,whisk the egg yolks, sugar , oil, orange zest and milk until combine. Sift in cake flour to the egg yolk mixture and mix until smooth and well combined
3. In a metal bowl, beat eggs whites with low speed as egg whites turn frothy, slowly increase the speed to medium and beat egg whits till soft peaks. Add in sugar in 3 portion. Continue to beat egg whites till stiff and moist with shiny form. Be careful not to over beat the egg white as it might be too dry or may water out.
4. Fold one third of beaten egg white with a spatula into egg yolk mixture to lighten and mix well. Incorporate another one third of the white and fold in well. Add in the rest of the egg white and fold gently in the egg yolk to obtain a smooth uniformly coloured foamy batter. Ensure all the batter is well mixed , by scraping the sides and bottom of bowl with spatula.
5. Pour the batter into a 10x12 inch tin lined swiss roll tin.Level the batter and bake for 10-15 min. Start checking for doneness at 10min. Cake is done when inserted toothpick come out clean. Allow sheet cake to cool.


Yam (Taro) paste :
(Adapt ->My Alternative Career)

Ingredients:
500g Taro
70g sugar
40g unsalted butter (melted)
150g pouring cream(whipped)
50g coconut milk (add a pinch of salt in it)


Method:
1. Freeze a metal bowl in freezer
2. Peel the taro and cut into small cubes
3. Steam the taro on high for about 30min, or till is soft and easy to mash.
4. When taro is done, mash it till fine add in melted butter , sugar and coconut milk . Mixed well  and set aside.
5. Take out the metal bowl from freezer,whipped the cream in it till stiff creamy .
6. Mix the whipped cream in the taro mixture till well combine.

Assemble the cake:
1. Carefully transfer the cake onto a greaseproof paper with the skin facing up.
2. Spread  taro paste on the cake and smooth it well
3. Gently roll the cake by using the paper to lift the cake and guide roll.
4. Rest the roll in the fridge to stabilize it shape.
5. Remove, slice and serve.

I simply love the soft orange cake  that combine with this creamy taro paste. I have 3/4 of the cake by myself over 3 days. My hubby love this cake but knowing how much I love it he just has to sacrifice his portion . 
If you are a yam lover tried this out , never expect yam and cream work so well .


I also did a yam cake chiffon cake for this swissroll on another day. However is not easy to incorporate the yam paste in the cake and the effect is not as smooth as this orange chiffon cake. I personally love the combination of the orange chiffon cake and yam paste. If you like to try out the yam cake recipe is in the yam paste link I adapt .


Saturday 22 September 2012

Blackforest Cake


Told you , that was this girl birthday  fall on Aug , normally I would just do a cake I would love to bake and bless the birthday person. However , occasionally I would ask the person what kind you would like to have for your birthday celebration. Most of the people would say any cake will do. This girl happen to be one that happily share with you her idea of a cake :) Her first choice was Green Tea Matcha Cake ~~ honestly I do not know will I able to bake that cake. 2nd was Black Forest Cake. I was thinking to bake her a Strawberry Mirror Cake.

Well if I do gave the birthday gal a choice I would like to do what they prefer if I can manage it.Hence voi la here is the Black Forest Cake !!

I have look through quite a number of recipe for this classic beauty.That was so many of variety of style , way to deco, how to cream it and even the chocolate cake base . I want  to have something simple and yummy . I always believe simplicity is beauty. When I share a recipe I wish people can easily get it and wont feel dishearted to try out. I started baking by following recipe that is 4 step and 6 ingredients type. It really help to boost my confident in baking being an amature.

This cake is not that difficult in fact that is really lot of recipe for this cake that is easy and simple to follow. I modify from 2 my love food blogger. So hopefully this will be one that you feel is easy to attempt :

Recipe Sharing as below :
Adapt from ->Chocolate Hidden Banana Cake ( Table for 2 or more)

99gm cocoa powder
150g Dark Chocolate ( Melted using double boiler style)
110gm all purpose flour
110gm cake flour
2 tsp baking powder
1.5 tsp sodium bicarbonate
250gm sugar 
1/8 tsp salt
6 large egg yolks
162gm corn oil
½ tsp vanilla extract.
6 large egg whites
 20g Cocoa Powder

Method :

1.. Preheat your oven at 175C. I did mine at 160C. Line a 8  inch round cake mould
2. Combine all purpose flour, cake flour, cocoa powder,baking powder, sodium bicarb, sugar and salt.Whisk it.
3 Combine melted chocolate with egg york well and add in oil beat in medium speed for 1 minute.
4. Put in vanilla and beat for a few seconds.
6. Put in half the dry ingredients (2) and beat on low speed until the dry ingredients are moistened. Put in the balance and beat on high speed for 1 minute.
7. Put in egg whites and whisk on high speed for 2 minutes.
8. Pour batter into round mould.
9. Bake in preheated oven for 30 minutes, or until skewer comes out clean
10. Leave cake to cool for 10 minutes and remove from pan to cool down completely on cooling rack.
11. Carefully cut the cake in 3 slices

As for the Cherry layer I adapt from another famous food blogger -> Joyofbaking

1 can of 680g Cherries
12 stalk of fresh Cherries
50g Sugar
2 tbsp of corn flour plus 1tbsp of water
2 tbsp of Sherry ( Kirsch) - I do not have kirsch so used Sherry
500ml Pouring Cream (whipped)

Method :

1.Place a metal bowl in freezer for whipping cream
2.Drain the cherries, reserving the liquid. Place the cherries in a bowl and toss with 2 tbsp of Sherry. Cover with plastic wrap and set aside.

3.Place the reserve cherry syrup in a small saucepan , put in sugar and heat till the sugar has dissolved and pour in the cornflour.Let it cool.

4.Take out the metal bowl from freezer and pour the cream in and beat it till stiff soft peak.

Assemble the cake :

1. Put the bottom layer of chocolate cake on smooth surface mat, brush the cherries liquid as (2) on the cake. Soak it as much as your cake to be moist.Cover with a layer of whip cream. Top with a handful of cherries. Spread it evenly.
2. Put the 2nd layer of the chocolate cake on top. Repeat the same process
3. As all 3 layer has been assemble, on top of the 3rd layer brush with the cherries liquid and cover the whole cake with cream.
4. Deco as you like it. You can put some shave chocolate in the middle and place fresh cherry on top of the cake as you want it to be.

The surprise of the birthday gal face is really worth the effort of going through all this process.
Again the cake is moist and the fresh cherry is refreshing
Give this a try , or you may even find another easy way of doing this classic beauty.


Friday 7 September 2012

Pandan Souffle Cake


Ooh . I told you am a pandan lover. I have first baked this souffle cake (相思海棉蛋糕) with one of my favour ingredient - Palm Sugar. ->Palm Sugar Souffle Cake . I simply love the texture of the cake . Honestly not quite sure what is the english name for this cake. Since is mostly egg white base and the spongy effect of it. I have it name Souffle cake .

I have the whole Palm Sugar Souffle cake all by myself within a week. Kept in an air tight cake container , it simply keep the moist and you wont feel full even if you have 3 -4 pieces at one time. It quite a dangerous cake ! As winter is ending soon , we have another steamboat dinner session at a friend's place. I often volunteer to bring  a dessert . All of us came from South East Asia, everyone just love and miss the pandan cake we often have back home. I promise to make something from pandan. Not always has to be the ->Pandan Chiffon Cake. So to have something different here is what I make .


My hubby has a great laugh about the height of this cake and don't quite understand why it rise so tall. All in all the cake is fluffy , full of pandan fragrant and everyone try to grab another extra piece if they can :)

Recipe adapt from ->SiewWei

Ingredients A:
Corn oil 65g
Milk 80ml (combine self made Pandan Essence 30g + Milk 50g / also can replace with Coconut milk)
Salt 1/4tsp
Egg yolk  100g
Egg 1pc
Superfine flour 65g ( I used cake flour)

Ingredients B:
Egg white 200g
Castor sugar 65g
Cream of Tartar 1/2tsp

Method A:
1.Combined Corn oil, Pandan milk, egg yolk and egg in a bowl.Whisk well till have little bubble.
2. Add in  Flour, mix well, set aside.( cover well and set aside ,do not let air get in )

Method B:
1. Combine egg white and Cream of tartar, beat in medium speed, slowly add in sugar, beat till soft peak form.
2. Mix A & B, pour the mixture into 7" loose base square baking pan. Steam bake ~ 150 degree, 55 minutes.
3. Inverted the cake pan, till it is cool completely.


Tuesday 4 September 2012

Japaneses Dark Pearl Chocolate Chiffon Cake


What  a name for this cake - Japanese Dark Pearl Chocolate Chiffon Cake. Honestly I am not a gal that is a big fan of chocolate. Not even when I was young, probably cause my family cant afford such luxury candy.

Well come back with this cake. I spotted this in my friend blog and got really curious about what is this Dark Pearl about. After digging into the recipe and search through the website, what a delight to know is Chiffon cake . Chiffon is always my love and I like it soft and moist. Is good to try out something different from the usual Pandan Chiffon Cake.

So here is my 1st attempt of this lovely Japanese Dark Pearl Chocolate Chiffon Cake. I did it another one the other night cause for no reason I just want some chocolate cake, and nothing can compare to a chiffon for a chiffon lover.


So here is the recipe I got from ->Bakericious

Ingredients :
Cocoa Batter:
150g chocolate cut to small chunk
 (I used a mixture of 30g 90% dark chocolate and 120g 20% chocolate)
 90ml water -> I have this substitute with milk / might add some liquor next time
100g corn oil
25g cocoa powder
65g cake flour
1/2 tsp bicarbonate of soda
115 g egg yolks (6 yolks for me)

Egg White Batter:
225g egg white (6 whites for me)
100g castor sugar (Reduced to 85g)
a pinch of salt
1/8 tsp of cream of tartar

Method:
1. Melt chocolate over steaming water and stir till smooth. Add in cornoil slowly, stirring all the time till smooth. Fold in the rest of the ingredients and stir till smooth.
2. Whisk egg white with cream of tartar till frothy, then pour in sugar gradually and then add in the salt. whiks till a soft peak is formed.
3. Fold egg white into the egg yolk mixture and then pour into a 23" to 25" round chiffon cake pan. (I used 23")
4. Bake at 180C for about 40 mins or till cooked.
5. Invert cake onto a cooling rack until completely cooled. Remove cake from pan and serve.


I beat up some cream add strawberry to go with  my cake. It just simply yum and the way I love it moist, soft , fluffy and the the cake is not too sweet as am using Lindth dark chocolate. Again a cake that end our night sweet and perfect :)

Friday 17 August 2012

Green Tea Strawberry Swiss Roll


My 1st Swiss Roll attempt. I have heard is an easy to make cake, and the taste is fantastic. I am quite daunting to make Swiss Roll , and why ? Am not sure do I know how to roll the cake nicely and will it break. Will it be firm as a roll or it will just turn out flat. As the cake is bake in a flat rectangle pan , overbake will break the cake and can not roll it at all. Hence this is a brave move for myself in my baking journey.

Thank GOD it turn out well and err I didnt roll the cake myself. I have my beloved to roll this cake , as he is good in rolling sushi and often his hand is firmer than mine. Sometime when it come to baking we have to be confident, even in the movement . It need to be done in one roll without pausing. So here is the 1st attempt of our swissroll.

I used the recipe from one of the lady who bake a lot and her swissroll seem easy to follow
 - > Happy Flour Green Tea Swissroll.

 I did not use red bean as filling , as my belove does not like red bean at all.  Strawberry is in season so is nice to whip up the cream and diced some strawberry and here we have a lovely filling with the green tea swiss roll


Ingredients
3 egg
60g caster sugar
1/4tsp salt
65g cake flour
1/4tsp baking powder
1tsp green tea powder
1tbsp hot milk
35g veg. oil
few drop of green food colouring ( I didnt use this the green tea powder is good enough)


150g whipping cream (whipped)
100g Strawberry diced

Steps:
1. Preheat oven to 200C.
2. Dissolve green tea powder with hot milk, add in few drops of green food colouring and leave it aside.
3. Use a cake mixer to whisk the eggs, salt and sugar until light and fluffy.
4. Shift the cake flour and baking powder into the cake batter in 3 portions and fold in.
5. Mix milk mixture and oil together and fold in lightly into the batter until well combined.
7. Spread batter in a lined and greased 10" x 13" tray.
8. Bake in a preheated oven for 10mins.
9. Remove cake from tray immediately and cool on a rack.

Assemble the cake:
1. Carefully transfer the cake onto a greaseproof paper with the skin facing up.
2. Spread whipped cream on the cake and sprinkle diced strawberry .
3. Gently roll the cake by using the paper to lift the cake and guide roll.
4. Rest the roll in the fridge to stabilize it shape.
5. Remove, slice and serve.

I would say the green tea powder I used suppose to be good quality however the result is not as what I expected. The cake is nice and moist but lack of green tea favour. The taste of the strawberry cream , beloved simply love it. Another thing to take note is , leave the cake to cold is easy to fold and the cream will not melt . I love this swiss roll and how easy it turn out, I did a few of it will share some of the recipe next round.

We finished the cake within 2 days and share with friends who come and visit us. Yes all my cake has to be share with friends. Is just my way of saying I appreciate them and wanted to show them my thought in my baking.

Wednesday 8 August 2012

Strawberry Mirror Cake


Voila.. Is winter in Australia now. Is strawberry session. How can I not take the opportunity to bake up something with strawberry.

Strawberry is in season it mean the price is cheaper and the fruit is big and juicy.Strawbeey is good at eating  fresh , coat with choclate and best for cake too. I has been "studying" this recipe for awhile. Was planning to bake this cake for one of the friend as a birthday cake . Thinking it might impress her and make her day. It seem a bit of work in making this cake so to avoid any fail , I plan to have a pre run before the actual day. So this is the result of my baking .


Yup the top is not really mirror effect. Sigh ! Sigh! How can I call a mirror cake when is clouded on the top! Arghh I really scream out loud when I saw what I did. Ok , I guess I did not wait long for the cream to set and pour in the syrup so it get melted and floating  in the jelly . Sigh... tsk tsk..

Ok enough of whinging . here is the recipe I used from my favourite blogger ->Table for 2 or more

Recipe sharing as below :

The sponge:-
2 eggs
2 egg yolks
100gm sugar
1/2 tsp vanilla extract
2 egg whites
1 pinch cream of tartar
1 tbsp sugar
50gm sifted cake flour


Moisting syrup:- mix and cool down.
50ml hot water
1 tsbp sugar


Strawberry Bavarian Cream:-
1 ½ tbsp unflavored gelatin
150 gm fresh strawberries + strained strawberries from preparing the mirror.(pureed)
2 egg yolks
70gm sugar
180 ml milk
1 tbsp lemon juice
200ml whipping cream

Strawberry Mirror:-
250 gm fresh strawberries
150 gm sugar
180ml water
1 tbsp lemon juice
1 tbsp unflavored gelatin


Method:

Assembling the cake.
1. Prepare cake. Place trimmed cake onto a 10 x 10 jelly roll pan. Put in the freezer.
2. Prepare strawberry juice.
3. Prepare bavarian cream.
4. Moisten cake with moisting sugar syrup and pour bavarian cream onto cake. Level the cream. Put in the fridge to set.
5. Prepare strawberry mirror and when mirror mixture has turned syrupy pour onto the bavarian cream layer. Place cake in the fridge to set.

Sponge cake:-
1. Preheat oven to 180/200C. Line a 10 X10 inch jelly roll pan. -> I used a square 8" pan
2. Beat eggs whites until foamy, then add in cream of tartar. Beat until soft peaks, then add in 1 tbsp of sugar and beat until stiff and glossy.
3. In a separate bowl, beat eggs, egg yolks, and sugar until creamy, pale and light. Beat in vanilla.
4. Sift cake flour. Fold into egg yolk mixture.
5. Stir in 1/3 of beaten egg whites into egg yolk mixture. Then fold in the rest of the egg whites.
6. Spread batter evenly in pan. Bake for 12-15 minutes.
7. When cake has cooled, remove baking paper, trim cake so that cake will have an even surface and remove the brown upper skin. Cover and place in freezer.


Bavarian Cream:-
1. Puree strawberries and sprinkle in gelatine powder. Stir it until the gelatine is well blended in well with the puree.
2. Whip egg yolks and sugar until pale and light.
3. Bring milk to a boil and pour in 1/4 of the milk into the egg yolk mixture while still beating with a mixer. Pour in the rest of the milk slowly. Mix well.
4. Return this mixture to the fire and cook with a low fire, stirring constantly, until your finger leaves a clear trail in sauce when drawn across the back of the spoon.(Do not boil or mixture will curdle.)
5. Immediately remove from heat and stir in strawberry mixture.
6. Pour into a stainless steel bowl and place over a bowl of ice water. Stir in lemon juice. Stir once a while to prevent the sides from solidifying.
7. While waiting for the strawberry custard mixture to cool down, whip whipping cream to soft peaks. Do not overbeat!!
8. When strawberry gelatin mixture has cooled and thickened to the consistency of softly whipped cream, fold whipped cream into strawberry custard mixture.


Strawberry Mirror:-
**I prepare strawberry juice(step 1-3) in advance because I `recycle' the strained strawberry pulp from the juice into the bavarian cream.
1. Chop strawberries into large chunks.
2. Place strawberries, sugar and water into a saucepan. Lightly press the strawberries to release juice. Bring to a boil.
3. Strain the juice with a strainer and don't press the fruits at this point.
** this step to be done only after bavarian cream has set on the cake.
4. Bring the strawberry juice that was prepared earlier to a boil. Remove from fire. Sprinkle in gelatine powder and stir to ensure the gelatine has melted.
5. Put in lemon juice. Stir. Wait for it to cool down and turn syrupy.


Note : The list is long but it does not take that long to do it , I did that at night. Probably not good for myself. After a long day work , I felt tire and it really take out the patience of me.

I did this another time by doing it in a cupcake form with another type of cake ( will post the recipe soon ) , is very successful . I gave it to my friends they all love it !

However this will not be cake I bake for the birthday gal . Why ? Because it seem fail ?? No.. is because she want something else. Ha quite difficult to please when you start to give people a choice. Maybe next time should not ask just bring whatever cake that turn out well. NowI need to search for that cake recipe and hope it turn out well ..

Wednesday 1 August 2012

Blueberry Creamcheese Orange Sponge Cake


This is another birthday cake for a beautiful new mom . She gave birth to a beautiful baby gal early this year. I think all woman especially mom deserve all special treat in their special day.

Am wondering what to bake for her . When it come to cake is always individual preference. Some love a soft moist cake , some love dense mud cake style. To me is always the soft moist cake I yield for .I knew she love blueberry , yet I do not want to bake a blueberry muffin ( as it seem the easiest for me to follow) for her as a birthday cake. So searching through recipe , I have to adapt some recipe and come out with this ->Blueberry CreamCheese Cake .

The recipe was modify and adapt from ->Table for 2 or more.

Orange Sponge Cake

Yolk batter
5 egg yolks
15gm sugar
35gm vegetable oil
35gm orange juice
1 Tbsp orange zest
70gm cake flour
1/4 tsp baking powder

Meringue
5 egg whites
35gm sugar
1/4 tsp cream of tartar

Preheat oven at 160(fan)/180C. Prepare an 7 inch square pan. Line the base only.
2. Prepare yolk batter. Combine all the wet ingredients + sugar + lemon zest. Sift cake flour + baking powder together and combine with everything until a smooth batter forms.
3. Prepare meringue. Beat egg whites with cream of tartar until soft peaks and beat in sugar gradually until stiff peaks form (hooked peak).
4. Prepare final batter. Fold ¼ of meringue into yolk batter until well combined. Repeat with another ¼. Pour the yolk batter into remaining meringue and fold until well combined (Fold not stir and it should look very foamy). Pour batter into prepared pan.
5. Bake the cake for 40-45 minutes or until done. Remove from oven and let the cake totally cool before removing cake from pan. (If it’s a springform pan, you can skip lining the base and then invert the pan to cool for better volume)
6. Slice cake into 3 slices and fill with blueberry creamcheese(recipe below) and chilled at least 2 hour before serve


Note :For this cake I only used 2 layer ,I freeze 1 layer and used it for other cake .


Blueberry Creamcheese

Blueberry compote

100g Bluberries
1Tbsp Water
2 Tbsp Lemom Juice

Prepare the blueberry compote. Cook blueberries with water and sugar until they bleed. Lightly mash it with a fork. Let it cool down to warm and press the blueberries through a sieve to remove the skin. Mix the sieved compote with lemon juice, it will turn reddish. Discard the skins in the sieve.

6g Gelatin
35ml Water
250g Cream Cheese
50g Sugar
300g Pouring Cream 150g Blueberrie ( for topping on each layer of the cake)


1. Freeze a mixing bowl in a freezer
2. Pour water into a heatproof bowl and sprinkle gelatin over.
3. Let it sit for awhile so that the gelatin granules will bloom. Heat bowl over hot pan of water let it dissolve.
4. Remove bowl from freezer, beat cream until soft peak . Transfer cream to a bowl and set aside in fridge.
5.With the same bowl beat cream cheese add bluerries compose a tbsp at a time until all combine & cream cheese till is smooth
6. Fold the whipped cream into cheese mixture.
7. With melted gelatin on your left and the cream chesse mixture on your right , sprinkle the gelatin into the cream cheese mixture and mix well.

Assembly the cake

1. Spread the cream chesse on each layer of the cake.
2. Top with blueberries on each layer of the cream
2. After spreading equally cream cheese on each layer of the cake , the reminding cream cheese spread even on the cake surface. Decorate cake to your liking.


I must admit I didnt do the decorate smoothly, however the combination of Orange Sponge and the Blueberry Cream Cheese is so yummy. All the friends love it and of course so is the birthday gal. I might do this cake again when an opportunity come by. 


Thursday 26 July 2012

Japanese Strawberry Shortcake


July is a month full of celebration :) I get to know my beloved husband during my holidays in Australia back in 2006. Honestly when you met some new friends you probably won't purposely remember when was the date or time you know each other. We can remember this special date is because I was on holidays and now this has become another special day to celebrate .

We met one another through a friend during my trip in Australia. Yes, our story is kind of romantic which not only happen in movie. Occassionaly I do believe movie does reflect real life story. As a believer of Christ we do not think this is by co-incident rather GOD has HIS way in our life.

To celebrate our 6th year annivesary of knowing one another , I got this heart shape mould to want to bake something special for ourself. Often I will bake for other people special moments and not so for myself . I have decided from now onwards I am going to do it for my family too .

Is winter time and strawberry is in season. It has been my thought to want to know how is a Japanses Strawberry Shortcake taste like. Looking through recipe from the net, and search from the my favourite blogger  -> Table for 2 or more so here is the recipe adapt from her site :

Cake:
120 gm. cake flour
1/4 tsp. baking powder
50 gm. sugar
50 gm. melted butter
50 gm. cornoil
4 egg yolks
1/2 tsp. vanilla essence
4 egg whites
65 gm. castor sugar

Decoration:
300 gm. whipped cream
10 strawberries (diced)
10 strawberries - thinly sliced
1 Tbsp. instant strawberry jelly + 2 Tbsp. boiling water - for glazing fruit ( I did not have strawberry jelly and substitute with 1Tbsp of sugar disolve in 1 Tbsp of hot water)

Method:
(1) For cake: Sieve cake flour, baking powder and 50 gm. of sugar into a bowl and mix thoroughly.
(2) Mix egg yolk, butter and cornoil together and then pour into flour mixture and stir till smooth.
(3) Whisk egg white till slightly frothy, then pour in 65 gm. sugar gradually and whisk till medium peak.
(4) Fold egg white with egg yolk mixture and then pour into a 8" Square tray and bake in preheated oven at 175C for about 45 mins. or till cooked.
(5) Leave cake to cool on wire rack and then slice cake into 3 slices.
(6) Whip up the whipping cream and then spread whipped cream onto each layer and sprinkle diced strawberries on top. Repeat till the last layer of sponge cake. Spread the cake on top with whipped cream. Arrange sliced strawberries on top overlapping one another.
(7) Mix instant strawberry jelly with boiling water then brush it over the sliced strawberries.
(8) Chill before slicing and serve.
 
Note : The mould I am using is 2 small heart shape mould, I actually used another square mould to bake the reminder of the cake mixture  for other baking 


The cake is soft and I love the combination of cream and strawberry. My hubby love it so much he ate it slowly just to enjoy it . The original plan was to get a bigger heart shape mould , well isnt it always happen in such a way when you look for it you cant find it but when you do not need it , it will always right infront of you. I am happy with the small cake so we can finished it at one serve and not overeating.


Wednesday 11 July 2012

Tiramisu


When I first started baking, one of the cake catches my eyes I would like to try is Tiramisu cake. Afterall is quite a fancy cake in cafe. Going through the recipes to get the right one, I realised this cake can be made without baking and some actually put in a glass to consume as a sweet dessert not totally a cake.

So I knew Tiramisu cake is can be present in different way, however the main ingredients for this cake is not only cheese but coffee and raw egg. Well I am not a coffee person at all. As coffee just make me way too happy and my heart will pump a lot usual than I would enjoy it ( too excited is not a good thing at time ).I pretty much told myself nah this is not a cake for me. Since I cant eat it  I wont think I will make it.

However , this is the cake I have make. So never said never and one really cant tell her own future right :)


Yup was my friend Elva birthday on end of June. She is a coffee lover, coffee bring live and smile to her. If she has not has her first coffee in the day , you probably will not want to talk to her. As she will be completely in her world and cant hear you. It was a suprise birthday party for her. We celebrate the rice dumpling festival together and at the end of the meal , light was off and cake was presented with loud birthday song sang. The look on her face worth all the effort in preparing this cake and bring smile to me each time I think of it

So here is the recipe link I adapt the recipe from ->Table for 2 or more. I used a normal square mould for the sponge cake and did not used piping to shape the cake in her way. As this is my first time I would say I would go for the simple way I know and slice the cake in half to assemble the layer of it.

I would have the recipe type here for future easy access :

Sponge
5 egg yolks
50gm sugar
5 egg whites
Pinch of cream of tartar
80 gm sugar
165gm all purpose flour

1. Prepare 2 pans (10X10 inch). Line with paper.
2. Preheat oven to 200(fan)/220C
3. Beat egg yolks with 50gm sugar until thick and pale. Set aside.
4. Wash beaters and beat egg whites until frothy. Add in cream of tartar and beat until soft peaks. Add in sugar gradually and beat until medium stiff peaks.
5. Pour beaten egg yolk into whites and sift half the flour over both type of eggs. Fold.
6. Sift remaining flour over batter and fold.
7. Put batter into piping bag with a 1cm round tip. Pipe lines of batter onto both pans.
8. Bake for 6-8 minutes.
9. Leave cake to cool totally before use.


Coffee Solution
1.5 Tbsp Nescafe gold
150ml boiling water
2 tbsp kahlua or more (optional, other other suitable liquors)

Combine both and set aside to cool down. It’ll taste pretty bitter. Mix with liquor.

Cheese Filling
6gm gelatin
30ml water
250gm cream cheese, room temp
3 pasteurized egg yolks, room temp
50gm sugar
300gm whipping cream(dairy), whipped to soft peaks
3 pasteurized egg whites, room temp
¾ tsp cream of tartar
80gm sugar
Cocoa powder for sprinkling

1. Place water into a heatproof bowl and sprinkle gelatin over. Let it sit for a while so that the gelatin granules will bloom. Heat bowl over hot pan of water or in the microwave to melt the gelatin. Refer to this post. Set aside to cool. Freeze a mixing bowl at this point for the cream
2. Beat egg whites in a clean bowl on high (hand mixer) for 1 minute. Put in cream of tartar and beat for another 4-5 minutes. It should have taken on form. Put in 80gm sugar gradually and beat for another 3 minutes. It should form peaks when beaters are lifted. Put in fridge while you do the next step. Take note that pasteurized egg whites needs more acid and more time to beat it up, and it yields lesser than regular egg whites.
3. Rinse the beaters and remove bowl from freezer. With that bowl, beat whipping cream until soft peaks. Transfer cream to a bowl and set aside in fridge.
4. With the same bowl, beat cream cheese until smooth, it’ll take only a minute. Put in 50gm sugar and beat for 1 minute. Put in egg yolks gradually and beat until smooth.
5. Fold the whipped cream into cheese mixture.
6. With your melted cooled gelatin in your left hand (if you’re right handed) and your hand mixer on your right, run the mixer on speed 1 or 2 (if 1 is too slow for ur machine). Drizzle in the gelatin as the mixer is on. Make sure the mixer mixes the gelatin evenly.
7. Pour cheese mixture into egg whites and fold. Use immediately to fill cake.

 Note : I did not used Kahlua instead I used Bailey and the result is fantasic .
           I did not used pasteurized egg as I cant find any here in Australia. With normal egg is still good .I guess just cant keep this cake for long and  must consume on the day it was make .


Interesting way for her to cut the cake as she does not want her name to be "cut off" . As the result I cant take a clear picture on the slice of cake. Not too sure will I bake this cake again. Maybe if someone requested it I will give it another tried. I have a small slice of myself , is not my custome not to eat my own cake . The taste is creamy and rich , full of coffee favour yet not over powering. Verdict is everyone love it :)

Friday 6 July 2012

Pandan PanCake


What for breakkie on a lovely weekend ?? Breakkie is a short form for breakfast. In this lovely country -Australia, a "cute" habit is to add " ie " at the end in some word to make it sound more neat :)

One of my friend who is a blog baker ->eelmsthebaker, has her pancake pic on FB one day, it attract my attention and would really love to give it a try. Of course as a follower of her blog , I will have an update each time that is any new blog uploaded, that give me the advantage to get the recipe when it happen :)

Pancake is a classic breakfast meal in western country, of course food should not have any boundary limit. And I believe food bring people together. If you ate something you love, you want to share it, if is something awful or disaster , I would say the more you would love to tell about it ,so others can avoid.

I make this lovely pancake on last 2 weekend. Of course being me, as a pandan lover. I modify the pancake by adding some pandan essence in the mixture and have this lovely Pandan PanCake as our lovely breakfast to start off our weekend. The texture is fluffy soft , crisppy and not too sweet. Is a healthy yet satisfiying meal to start off a weekend .

To have the original recipe do follow the link ->Clinton Street baking company pancake

I will have the recipe (with pandan flavour) as below as well :

Make 12 -3 inch size pancake

Ingredients :

128g All Purpose Flour ( 1cup)
1 tsp Baking  Powder
35g caster sugar
1/4 tsp salt
2 eggs ( seperate yolk and white)
180ml whole milk
43g unsalted butter (melted)
5g unmelted for the pan
1/2 tsp pandan essence

Method :


1. Mixed all purpose flour, baking powder together.
2. In a mixing bowl, combine sugar, salt , egg yolk , whole milk mix well.
3. Sift in the all purpose flour , pour in the melted butter and pandand essence.
4. Beat the egg white till soft peak, fold in the egg white to the all combine mixture.
5. Oil the pan with butter, scoop a laddle of pancake batter into the pan and cook till well.
6. Enjoy it with some cream or honey . I like mine plain with a cuppa :)

Voila!!


Thursday 14 June 2012

Green Tea Chiffon Cake


Another night of chiffon cake craving. I just not too sure what is going on in this winter season. It seem every night I just need some sweet with a cup of hot chocolate as a comfort before I being tuck in bed by my love one hahaha.

We do not want to have too big a cake and also would love to try out my 15cm chiffon cake mould so I bake this little Green Tea Chiffon Cake. As I can not really find a recipe that with such little ingredient to fit in the mould I come out with my own recipe and the result is just what I want . So happy to have this little cake for a night and enjoy the fragrant of tea with a cup of hot chocolate in a cold winter night.

So here is the recipe , you might want to try out if you looking for just a cake for a night ;

Ingredients

Part A:

2 Eggs yollks
35g Cake flour
15g Castor Sugar
40g hot milk
30g Oil
1/4 tsp of Baking powder
1 tsp of Green Tea powder
A pinch of salt

Part B :

2 Eggs White
25g Castor Sugar
1/4 tsp Cream of Tartar

Method :
Preheat oven 165C
1. Mixed green tea powder in the hot milk and let it cool down slightly.
2. Mixed cake flour, baking powder and a pinch of salt well.
3. Add mixed flour into warm milk and stir well as it form a soft dough
4. Whisk the egg yolk and sugar until completely dissolved
5. Add in the egg yolk and oil to the flour mixture combine till well
6. Beat egg white with cream of tartar and gradually add in sugar till soft peak form.
7. Fold the egg white into the flour mixture as above.
8. Pour the mixture in the mould and baked in the oven for 30min or till cook
9. When the cake is cook, invert cake leave it cool


We enjoy the cake in 2 night. Well at least you do not feel guilt having a light chiffon cake before bed time. Is just so right for a cold winter night .

LinkWithin

Related Posts Plugin for WordPress, Blogger...